August 18th 2014, Qt Creator and Android
← August 15th 2014 Qt Mobile Development Environment | ● | August 24th 2014 Qt Creator Options →
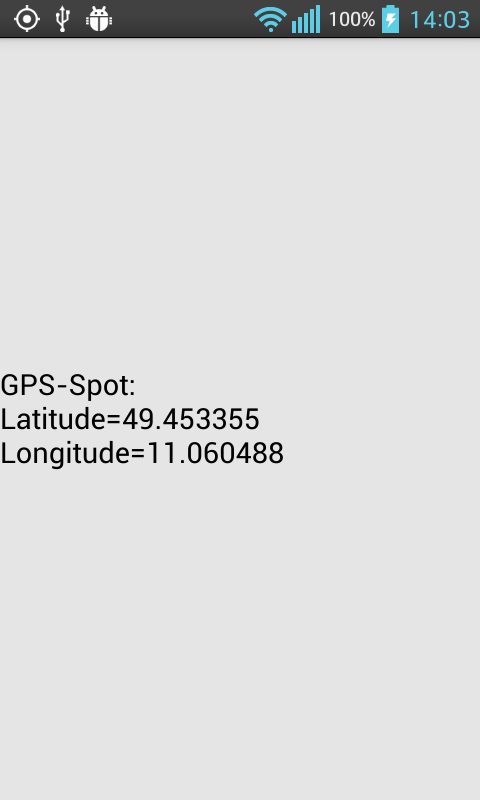
Now that we have setup our Qt Mobile development environment, we fire up Qt Creator to build and run a simple test application. As application we use the “GPS-Spot” app which just displays the current GPS position as text. For more information on that app, see the Necessitas tutorial. The app looks like that:
mainwindow.h:
#define MAINWINDOW_H
#include <QtWidgets/QMainWindow>
#include <QtWidgets/QLabel>
class QGeoPositionInfo;
class QGeoPositionInfoSource;
class MainWindow : public QMainWindow
{
Q_OBJECT
public:
explicit MainWindow(QWidget *parent = 0);
virtual ~MainWindow();
protected:
QLabel *gpsLabel_;
QGeoPositionInfoSource* locationInfo_;
void startGPS(int minInterval = 1000); // ms
void stopGPS();
protected slots:
void updateGPSLocation(const QGeoPositionInfo &geoPositionInfo);
void timeout();
};
#endif // MAINWINDOW_H
mainwindow.cpp:
#include <QtPositioning/QGeoPositionInfo>
#include <QtPositioning/QGeoPositionInfoSource>
MainWindow::MainWindow(QWidget *parent)
: QMainWindow(parent)
{
gpsLabel_ = new QLabel("GPS-Spot");
setCentralWidget(gpsLabel_);
startGPS();
}
MainWindow::~MainWindow()
{
stopGPS();
delete gpsLabel_;
}
void MainWindow::startGPS(int minInterval)
{
// obtain the location data source
locationInfo_ = QGeoPositionInfoSource::createDefaultSource(this);
if (locationInfo_)
{
// select positioning method
locationInfo_->setPreferredPositioningMethods(QGeoPositionInfoSource::AllPositioningMethods);
// query update interval
int interval = locationInfo_->minimumUpdateInterval();
if (interval<minInterval) interval = minInterval;
locationInfo_->setUpdateInterval(interval);
// when the position has changed the updateGPSLocation slot is called
connect(locationInfo_, SIGNAL(positionUpdated(QGeoPositionInfo)),
this, SLOT(updateGPSLocation(QGeoPositionInfo)));
// when the position could not be determined the timeout slot is called
connect(locationInfo_, SIGNAL(updateTimeout()),
this, SLOT(timeout()));
// start listening for position updates
locationInfo_->startUpdates();
}
}
void MainWindow::stopGPS()
{
if (locationInfo_)
{
locationInfo_->stopUpdates();
delete locationInfo_;
}
}
void MainWindow::updateGPSLocation(const QGeoPositionInfo &geoPositionInfo)
{
QString text="GPS Spot:\nunknown";
if (geoPositionInfo.isValid())
{
// get the current location coordinates
QGeoCoordinate geoCoordinate = geoPositionInfo.coordinate();
// transform coordinates to lat/lon
qreal latitude = geoCoordinate.latitude();
qreal longitude = geoCoordinate.longitude();
text=QString("GPS-Spot:\nLatitude=%1\nLongitude=%2")
.arg(latitude,0,'g',8)
.arg(longitude,0,'g',8);
}
gpsLabel_->setText(text);
}
void MainWindow::timeout()
{
updateGPSLocation(locationInfo_->lastKnownPosition());
locationInfo_->startUpdates();
}
main.cpp:
#include <QtWidgets/QApplication>
int main(int argc, char *argv[])
{
QApplication app(argc, argv);
MainWindow mainWindow;
mainWindow.show();
return(app.exec());
}
With the following QMake project:
TARGET = GPS-Spot
TEMPLATE = app

SOURCES += main.cpp mainwindow.cpp
HEADERS += mainwindow.h

QT += core widgets network sql positioning
Note that the above project does not work with Qt 5.2, since it does not include the positioning module, which is featured by Qt 5.3 and above.
The full source code of the GPS-Spot example is available here:
https://sourceforge.net/p/libpong/code/HEAD/tree/GPS-Spot/
We check out the example via SVN
svn co http://svn.code.sf.net/p/libpong/code/GPS-Spot GPS-Spot
and open the GPS-Spot.pro project file with Qt Creator.
In the following we “Androidize” the app by sticking to Bogdan’s hints:
http://www.kdab.com/qt-android-episode-3
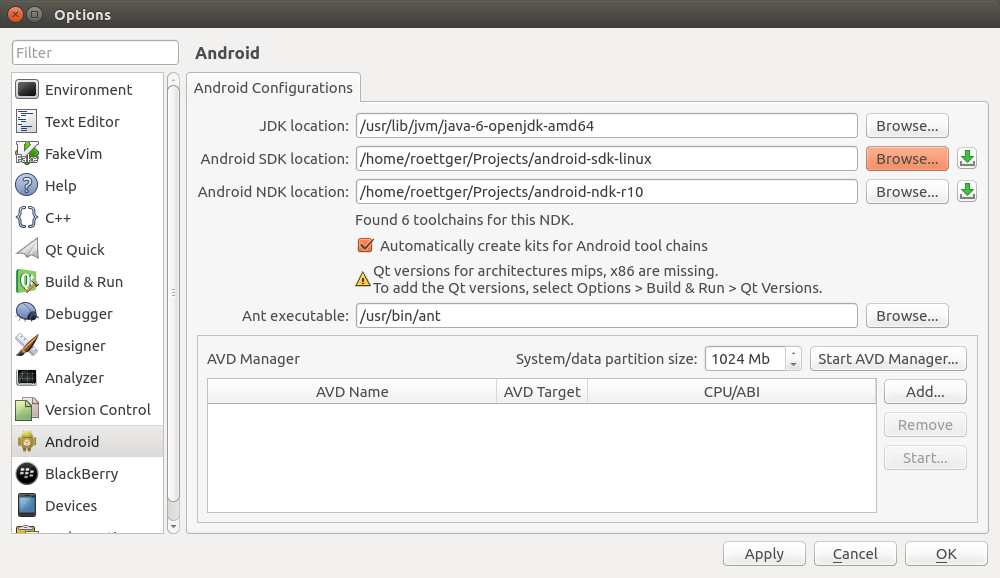
1) In the project configuration of Qt Creator we add the locations of the previously installed SDK and the NDK.
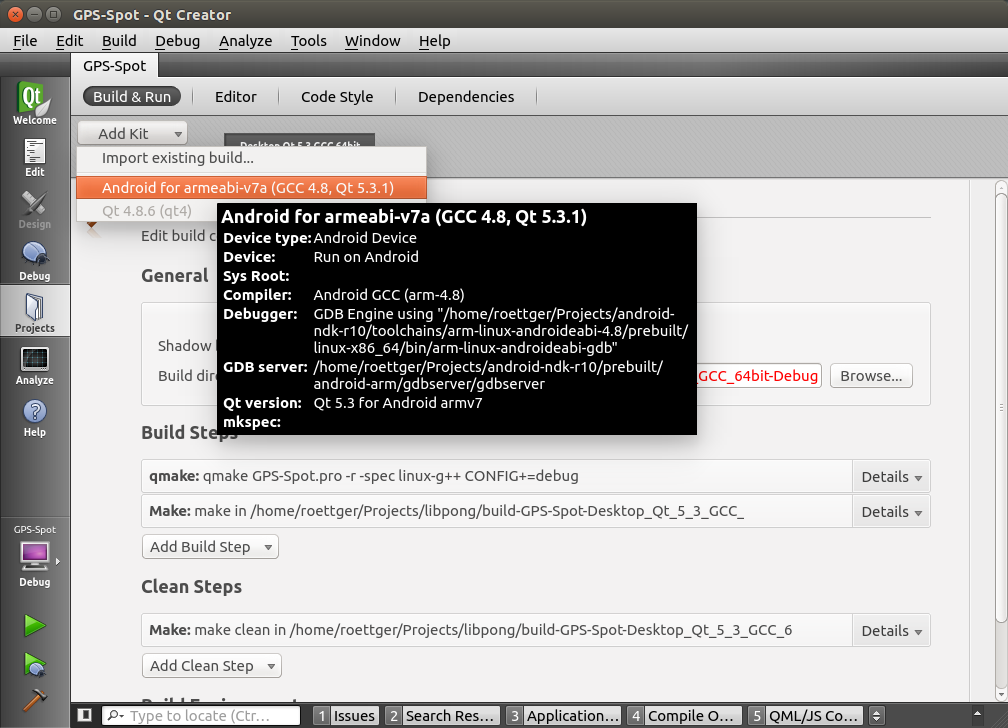
2) Choose the “Projects” tab from the left side, then “Build&Run” and add an Android Kit to the project (e.g. armeabi-v7a).
3) Create an Android Manifest by switching to the “Run” section of the “Projects” tab and clicking on “Create Android Manifest.xml”. In the manifest editor enter appropriate settings in the “Package” and “Application” section, but do not alter the “Permissions” section, since the included default Qt permissions are usually fine.
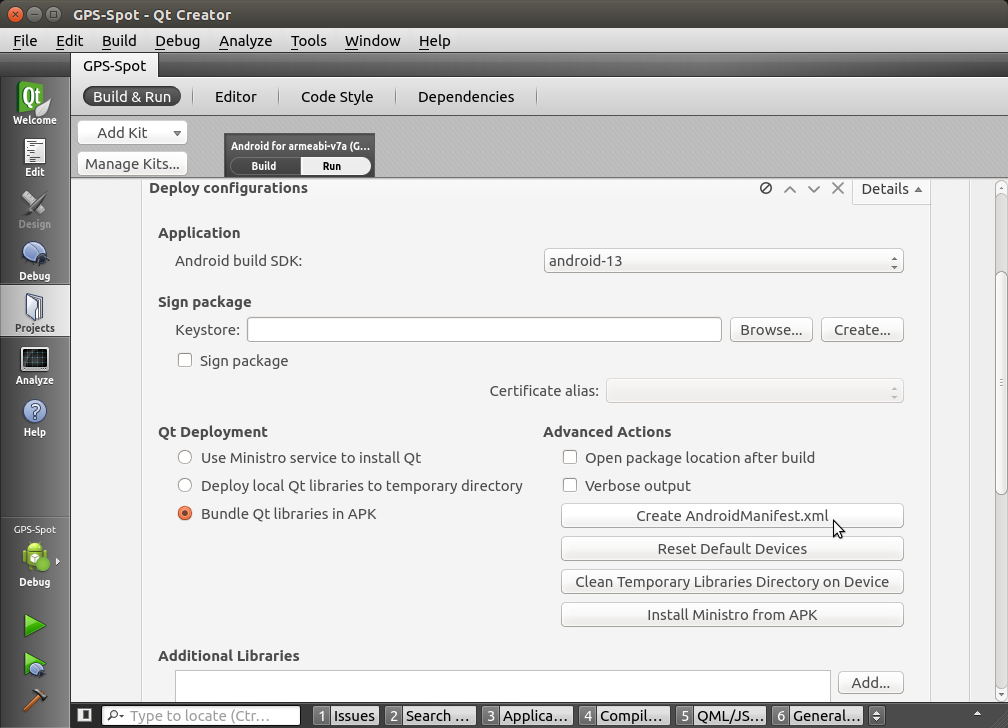
In the above dialog also be sure to select the “Bundle Qt libraries in APK” option and the correct ABI version.
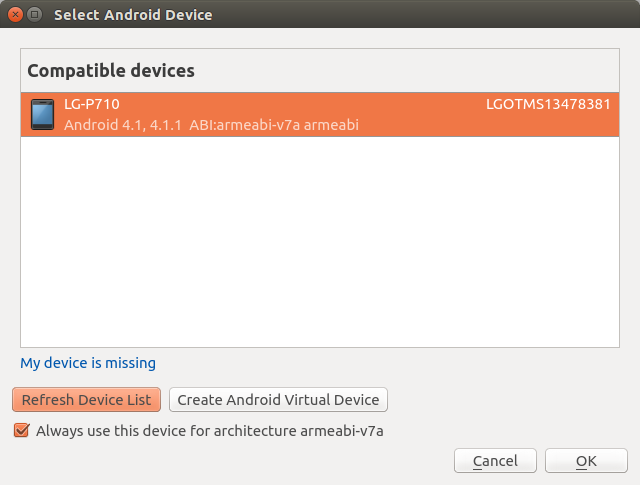
4) Hit the “Run” button (the big green arrow on the left side) to build and deploy your application on your Android device. The first time you run it, a window will popup, which let’s you select your device from the list of connected ones. Check “Always use this device” to make that device the default deployment for the actual ABI version.
5) Make a screen shot of the running Android app (Press and hold the Power and Lower buttons until you hear a capturing sound).
6) Further reading:
← August 15th 2014 Qt Mobile Development Environment | ● | August 24th 2014 Qt Creator Options →