Necessitas Android-Qt Blog
This tutorial is a blog about my experience with Necessitas.
Necessitas is the KDE community port of Qt for the Android platform. I am trying it out to make a few first steps on the Android platform with Qt.
Note: This tutorial dates back to Spring 2013. It describes building an Android app with a outdated version of the Qt 4.7 Android port, that used to be called Necessitas at that time. In 2014 the Necessitas port has been integrated into Qt 5.3. Although the tutorial is sort of outdated, it still explaines the principles of writing a Qt app for Android, which haven’t changed for Qt 5.3, but for a more up to date version of the development procedures please see the Project Pong blog.
April 22, 2013, Getting Started
Let’s grab the Necessitas SDK and install it!
http://necessitas.kde.org/necessita/necessitas_sdk_installer.php
Here is a youtube video for getting started on Linux:
http://www.youtube.com/watch?v=suPeZ7XC1xk
My platform is a MacBook Pro with MacOS X 10.5.8. The Necessitas page says that Necessitas will run on Linux, Mac and Windows alike, although Linux is recommended. So let’s give it a try on the Mac platform.
To put things short, my attempts to get Necessitas running on Mac were not successful. I strongly suggest to use a Linux box. But see for yourself…
Ok, let’s follow the installation instructions…
… Well, that wasn’t going far. After unpacking the Necessitas SDK Mac installer, it just crashed. Not very promising. Anyways, if the installer won’t work, we compile Qt by ourselves as outlined by the following instructions:
http://community.kde.org/Necessitas/CompileQtFramework
April 23, 2013, Compile The Sources
The first advised step is to grab the Android SDK:
http://developer.android.com/tools/sdk/ndk/index.html
I downloaded the 32-bit NDK r8e for Mac.
Next, we get the sources of the Necessitas Qt port for Android via git:
git clone git://anongit.kde.org/android-qt.git
We checkout the branch we want to compile, in this case “master”:
git checkout "master"
And finally, we compile:
cd android-qt
./android/androidconfigbuild.sh -n /path/to/android-ndk/ -q 1 -d 1
This will take a while, so get yourself a coffee. A single one won’t suffice, so maybe we better go hiking for a while…
April 25, 2013, Mac Issues
After having a decent break, the compilation finished. But, well, there were compilation errors again. Since it does not appear too promising to track those down, I decided to give it a last try on my MacBook at work. This one has MacOS X 10.6. If the installer won’t work for this one as well, I am simply going to use a Linux box instead.
I gave it a quick try and the installer worked flawlessly with an OpenSuse 12.1 distro. I downloaded the installer, added exe permissions via “chmod +x linux-installer…” and ran it from the cmd line, fine. Note: Be sure to select ant for installation.
April 25, 2013, QtCreator
Now, that we have installed the Necessitas SDK, what can we do with it? We open QtCreator and manage and develop our projects with it.
To do so, we should fire up QtCreator (on Linux start QtCreator/bin/necessitas from the cmd line) and make sure that QtCreator can see the Android Qt framework. Select the Build & Run section of the program options, then select the Qt Versions tab and check that it reads something like the following:
Necessitas 4.8.2n for Android armv5.
If that’s the case, we are ready to create a new Qt Mobile Android project: Click on the Project tab on the left and create a new project of the type “Mobile Qt Application”.
You will be asked to choose the ARM processor architecture. In the Necessitas SDK there is support for ARM v5 and ARM v7a. I am choosing ARM v5 for backwards compatibility.
I have a Samsung Galaxy Ace 2 with an ARM Cortex-A8 processor core implementing the ARM v7 instruction set architecture. Still, it is better to choose ARM v5, since the emulator does not appear to be working with ARM v7a yet.
April 27, 2013, Qt Mobile
Now that we have the toolchain installed and ready to be used, we want to make a test by deploying a Qt Mobile example app. There is a simple test case available from the Qt developer pages that displays the battery status with the Qt Mobile frame work on a Nokia phone (or the Maemo simulator for Symbian phones):
http://doc.qt.digia.com/qtcreator-2.1/creator-mobile-example.html
I am going to do the same, but deploy a slightly modified Qt Mobile example on my Android smartphone.
That is, we are not going to simply connect the battery status to a widget via
QSystemDeviceInfo *deviceInfo = new QSystemDeviceInfo(this);
connect(deviceInfo, SIGNAL(batteryLevelChanged(int)), widget, SLOT(setValue(int)));
but we are going to listen to geospatial positions updated from the GPS receiver as outlined at
http://qt-project.org/wiki/Retrieve_Location_Using_Qt_Mobility
April 28, 2013, MacOS X 10.6
Today I tried the Mac installer again. It worked without any problems on my MacBook Pro with MacOS X 10.6.8.
The only flaw is that they compressed the installer with 7-zip. I had to install the latest 7zX unzipper to extract the .7z archive.
April 29, 2013, MacOS X 10.5
It appears that I had an out-dated version of 7zip installed on my other MacBook Pro, that did not unzip the SDK installer properly causing a weird crash. With the latest 7zip version 1.7.1, I was able to extract the Mac SDK installer even with MacOS X 10.5.8. But hey wait, while running the installer I get installation errors.
So the message is: The Necessitas SDK installer is fine on OpenSuse 12.1 and MacOS X 10.6, but not on MacOS X 10.5.8.
April 30, 2013, Creating and Building a new Project
Now, we are going to create a new project with QtCreator to display the battery status as a starting point and change that later on to spot our GPS location.
In the QtCreator we select File → New File or Project → Applications → Mobile Qt Application → Choose.
Then we provide a name for the mobile application. For our example app that will show the actual GPS postion we choose “GPS-Spot”.
Next we confirm to use the default build kit for the armv5 instruction set. Done.
We have created a project template that contains the following files:
- GPS-Spot.desktop
- GPS-Spot.pro
- GPS-Spot64.png
- GPS-Spot80.png
- GPS-Spot_harmattan.desktop
- deployment.pri
- main.cpp
- mainwindow.cpp
- mainwindow.h
- mainwindow.ui
The files come with the necessary boiler plate code that we have to modify, as described in the following sections.
Declaring the Qt Mobility API
To use the Qt Mobility APIs we have to modify the .pro file to declare the Qt Mobility APIs that you use. Double click at the .pro file in the tree view of the edit pane of QtCreator to open an editor window.
This example uses the Mobility System Info API, so we must declare it, as illustrated by the following code snippet:
 CONFIG += mobility
 MOBILITY = systeminfo
Completing the MainWindow Header File
In the Projects view click on the Edit icon on the left and double-click the mainwindow.h file to open it for editing.
We include the System Device Info header file, as illustrated by the following code snippet:
Right after the header files (not before!) we declare to use the Qt mobility name space, as illustrated by the following code snippet:
Also declare a private member variable as a pointer to a device info object to be created later on:
QSystemDeviceInfo *deviceInfo_;

Designing the User Interface
Double-click the mainwindow.ui file in the Projects editor view to launch the integrated Qt Designer.
Drag and drop a text label (QLabel) widget to the canvas.
In the Properties pane in the upper left, change the objectName of the QLabel object from “label” to “batteryLabel”.
The necessary code to setup all designed UI elements of a widget is integrated into an auto-generated “ui” object. This object is is created in the constructor of the respective class. For example, the constructor of the MainWindow class creates a ui object of the type UI:MainWindow. When calling its setupUI method, the GUI elements are constructed according to the description of the mainwindow.ui file:
: QMainWindow(parent), ui(new Ui::MainWindow)
{
ui->setupUi(this);
}
All designed gui elements become a member variable of the ui object, referenced to by ui→objectName. For example, to set a text on a label object with the name objectName we call:

Completing the MainWindow Source File
In the Projects view, double-click the mainwindow.cpp file to open it for editing.
Add the following code to the MainWindow constructor to read the battery level from the device info API and pass changing levels on to the battery label:
ui->batteryLabel->setNum(deviceInfo_->batteryLevel());
connect(deviceInfo_, SIGNAL(batteryLevelChanged(int)),
ui->batteryLabel, SLOT(setNum(double)));
And finally, we delete the device info in the MainWindow destructor:
{
delete deviceInfo_;
delete ui;
}
Compiling
Now that you have all the necessary code, click on the “Hammer” symbol on the left to compile the project and check for errors and warnings.
Nice! The compiler finished without any errors on my Mac.
But we are not yet finished. What about the linker? Needless to say, that there is a bug somewhere lingering. In this case the linker just crashes with a bus error!
At this point I am switching over to my Linux box with OpenSuse 12.1 and forget my Mac for the moment.
May 6, 2013, Running in the Simulator
On my Linux box the GPS-Spot app compiled and linked.
To test it, we need to create a simulation device for the emulator.
In QtCreator select Tools → Options and switch to the Android tab. Now click at the “Start AVD Manager” button and create a new SD Card with 1024 MiB space for an Android Virtual Device with API Level 10 (Android 2.3.3). Also select WVGA 480×800 screen resolution matching the resolution of my Samsung Galaxy Ace 2 smartphone.
The best way is to clone the settings of the Google Nexus S Device shown in the device tab, which has the same screen resolution as the Galaxy Ace 2.
So we create an Android Virtual Device (AVD) from the Google Nexus S device and name it “Ace2”.
Click on the Ace2 AVD and start the emulator. Keep the emulator window open.
Download the “Ministro II.apk” from here and run the following cmd line to install the Ministro package on the AVD:
adb install <full path file name of the ministro apk>
The command “adb” stands for Android Debug Bridge. It is located in the “android-sdk/platform-tools” directory of the SDK.
Some background information about KDE.org hosting Ministro.
Back in Qt Creator we need to adjust a final setting before we can start the app in the simulator: click at the Project icon on the left side and switch to the tab of the project. Under “Build&Run” we click at the “Run” tab of the “Necessitas SDK for Android” kit and change the deploy settings to “Deploy local Qt libraries”.

Now click at the green play button to run the app in the Qt Simulator.
If for some reason the process for the app is not starting in the emulator, make sure that you have
- created a Qt Mobile App for armv5
- a valid AVD with Android 2.3.3 running
- installed a proper version of Ministro II
- checked to deploy the local Qt libries
- enabled Qt Mobility in the project file
In my experience, the slighest deviation from those setting does cause trouble!
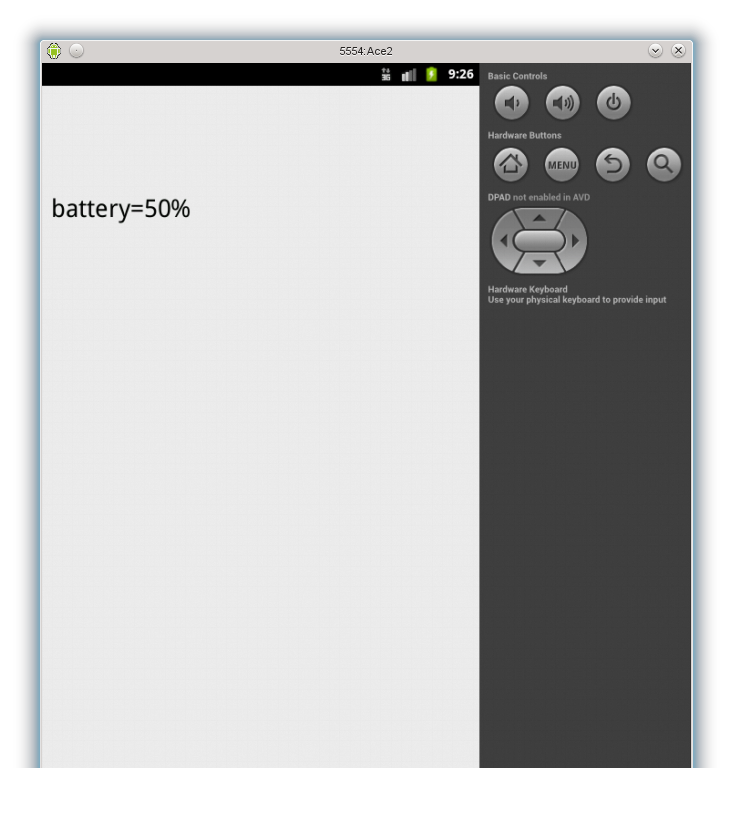
Let’s tweak the app a bit: we connect the battery level changed signal to a private slot setBatteryLevel(int) and create a more verbose output:
{
QString text=QString("battery=%1%").arg(level);
ui->batteryLabel->setText(text);
}
Back to my Mac
Since the linker stage crashed on MacOS X 10.6, I tried to get a more recent version of the XCode tools. The latest free version for MacOS 10.6 is XCode 3.2.6. I already have that one installed. A newer XCode version 4.2 is said to be available for Snow Leopard, but only through a paid Apple developer connection. From version 4.2.1 XCode is available for free for MacOS X Lion.
So that’s it finally with my Mac adventure. I can’t get Necessitas to run on MacOS 10.5 and even 10.6, since I do not want to pay Apple for an otherwise free development tool.
Maybe, at a later point I get my hands on a MacOS X 10.7 install disk and try my best again, but for the rest of this blog I definitely stick with a Linux box.
May 7, 2013, Modifications for Retrieving the GPS Position
First, we add another label named “spotLabel” with the integrated Qt Designer.
Then we setup a slot that receives location updates by calling the following setupGPS() method in the MainWindow constructor:
{
// obtain the location data source
locationInfo_ = QGeoPositionInfoSource::createDefaultSource(this);
// select positioning method
locationInfo_->setPreferredPositioningMethods(QGeoPositionInfoSource::AllPositioningMethods);
// when the position has changed the setGPSLocation slot is called
connect(locationInfo_, SIGNAL(positionUpdated(QGeoPositionInfo)),
this, SLOT(setGPSLocation(QGeoPositionInfo)));
// start listening for position updates
locationInfo_->startUpdates();
}
And output the updated locations, if any, in lat/lon coordinates:
{
QString text="Location=unknown";
if (geoPositionInfo.isValid())
{
// get the current location coordinates
QGeoCoordinate geoCoordinate = geoPositionInfo.coordinate();
// transform coordinates to lat/lon
qreal latitude = geoCoordinate.latitude();
qreal longitude = geoCoordinate.longitude();
text=QString("Latitude=%1\nLongitude=%2")
.arg(latitude,0,'g',8)
.arg(longitude,0,'g',8);
}
ui->spotLabel->setText(text);
}
Add the following line to the .pro file:
MOBILITY += location sql
Make sure that “Deploy local Qt libraries” is checked again. Once the libraries have been deployed the first time, this option is unchecked automatically. To deploy additional libraries it needs to be checked again.
To get access to the location services we need to add appropriate permissions to the Android manifest.
In the project view, open the “Run” Settings and under “Package Configuration” select the “Permissions” tab. Add the following permissions:
- ACCESS_COARSE_LOCATION
- ACCESS_FINE_LOCATION
Don’t forget to save!
Also select the “Libraries” tab and check that QtLocation and QtSql are selected.
We run the app and provide a test gps location by connecting to the emulator via telnet:
telnet localhost 5554
Then we can use the geo command to set a geographic position
geo fix <longitude value> <latitude value>
For example, the geographic position of Kailua, Hawai’i:
geo fix −157.739515 21.397370
For some reason the GPS location slot is not receiving any updates. Instead the updateTimeout signal is emitted. Also, the value of lastKnownPosition can be bogus when the GPS receiver tries to reestablish a lost satellite connection. After excessive reading and testing, giving me major headaches, it appears that Qt Mobility (Qt 4.8) is to be blamed.
As a workaround we connect the following timeout slot to the updateTimeout signal, so that at least we are getting notified that we do not have a GPS position available:
{
setGPSLocation(locationInfo_->lastKnownPosition());
locationInfo_->startUpdates();
}
It appears we have to wait for Qt 5.0 to fix the GPS support for the emulator. We’ll follow the latest news to monitor work on Qt5.
Alternatively, we try the app on a real Android device and not the emulator. Let’s see if Qt Mobility does a better job on my Ace 2. I hope so…
Running on a Real Mobile Device
First off, we need to see if the Android Debug Bridge recognizes any Android device plugged in via USB. So plug in your phone and run:
adb devices
If you see it listed, then you are almost done:
- install Ministro on your device
- adb -d install <path to Ministro apk>
- install your App on your device
- adb -d install <path to your apk>
If you do not see it listed, make sure that it is actually connected by running “lsusb”. If you see a Android device connected on the USB bus, then we adhere to Google’s instructions on setting up a hardware device.
Let’s see how it works out for my Ace 2 with OpenSuse 12.1:
> adb devices
List of devices attached
So adb does not see my Ace 2, yet.
> lsusb
Bus 001 Device 001: ID 1d6b:0002 Linux Foundation 2.0 root hub
Bus 002 Device 001: ID 1d6b:0002 Linux Foundation 2.0 root hub
Bus 001 Device 002: ID 8087:0024 Intel Corp. Integrated Rate Matching Hub
Bus 002 Device 002: ID 8087:0024 Intel Corp. Integrated Rate Matching Hub
Bus 001 Device 004: ID 058f:a014 Alcor Micro Corp.
Bus 001 Device 005: ID 0bda:0139 Realtek Semiconductor Corp.
Bus 003 Device 001: ID 1d6b:0002 Linux Foundation 2.0 root hub
Bus 004 Device 001: ID 1d6b:0003 Linux Foundation 3.0 root hub
Bus 001 Device 006: ID 0cf3:3005 Atheros Communications, Inc. AR3011 Bluetooth
Bus 003 Device 003: ID 04e8:6860 Samsung Electronics Co., Ltd
But it is connected to Bus 3 Device 3, good!
So we follow the Google instructions:
- Enable USB debugging on your device.
On most devices running Android 3.2 or older, you can find the option under Settings → Applications → Development. On Android 4.0 and newer, it’s in Settings → Developer options.
Note: On Android 4.2 and newer, Developer options is hidden by default. To make it available, go to Settings → About phone and tap Build number seven times. Return to the previous screen to find Developer options. - Also allow Mock locations on your device.
> adb devices
List of devices attached
9E3838FEF88FEBEA47D7DCE99F168BE device
Here we go :)
> adb -d install ~/Projects/Ministro\ II.apk
145 KB/s (542653 bytes in 3.631s)
        pkg: /data/local/tmp/Ministro II.apk
Success
Now run your application in QtCreator and it will automatically recognize the attached Android device. Don’t forget to check “Deploy local Qt libraries”!
Congrats, we are done!!!
Some indoor screen shots /wo and /w GPS switched on:


Access the full GPS-Spot example via WebSVN:
Checkout the Qt Mobility example via SVN:
May 8, 2013, Making a Custom Icon
We fire up Inkscape and select File → Document Properties for a canvas size of 256×256 pixels.
After some artistic drawing we save and export the full drawing as PNG.

Now we use ImageMagick to convert the original 256×256 PNG image to the required icon sizes:
> convert GPS-Spot.png -geometry 64 GPS-Spot64.png
> convert GPS-Spot.png -geometry 80 GPS-Spot80.png
Under Projects view → Run → Package configurations → Application icon choose the newly created icon.
That’s it!
To be continued in ProjectPong