Windows Build Instructions for QTV3
Prerequisties
To build the QTV3 application on Windows 7 it is assumed that Steps 1–12 of the Ubuntu tutorial are finished and a virtual machine with Visual Studio 2010 has been setup.
Qt
- Download Qt
- ftp://ftp.qt.nokia.com/qt/source/qt-everywhere-opensource-src-4.7.4.zip
- Unzip the source archive.
- Right-click at it and choose “Extract all”.
- Compile Qt
- Open a MSVC command prompt via
- Programs → MSVC → Tools → MSVC Command Prompt
- Change directory (cd) to the Qt directory.
- Configure Qt
configure -platform win32-msvc2010 -opengl desktop -release -static -no-libpng -no-sql-sqlite -nomake examples -nomake demos -nomake tests -opensource -confirm-license
- Compile Qt
nmake- While Qt compiles, you’ve got time to drink plenty of coffee.
- Open a MSVC command prompt via
- Setup Qt
- Add the Qt “bin” directory to your PATH environment variable.
- System → Advanced → Environment Variables → PATH
- Add the Qt “bin” directory to your PATH environment variable.
- Check Qt
- On the MSVC command prompt
- qmake —version
- Should read “QMake version 2.01a”
- On the MSVC command prompt
Checkout
- Create new build directory
- Assumed to be “Projects” in your home folder.
- Checkout $V^3$ with Tortoise SVN
- Url: http://svn.code.sf.net/p/volren/code/viewer
- Destination: …/Projects/vvv
- Checkout prebuilt WIN32 dependencies with Tortoise SVN
- Url: http://svn.code.sf.net/p/libmini/code/libmini/WIN32
- Destination: …/Projects/WIN32
Build libMini
- Configure libMini with the CMake GUI
- Source: …/Projects/vvv/mini
- Build: …/Projects/vvv/mini
- Build the libMini library with VS10
- Double click at the solution file: …/Projects/vvv/mini/libMini.sln
- Be sure to choose “RelWithDebInfo” as solution configuration
- Build the solution
- Double click at the solution file: …/Projects/vvv/mini/libMini.sln
Build DCMTK
- Get DCMTK 3.6.0 from
- http://dicom.offis.de/download/dcmtk/dcmtk360/dcmtk-3.6.0.zip
- Right-click at the downloaded file and extract all to “dcmtk”
- Configure DCMTK with the CMake GUI
- Source: …/Projects/dcmtk
- Build: …/Projects/dcmtk
- Important: Uncheck the “DCMTK_OVERWRITE_WIN32_COMPILER_FLAGS” before clicking at “Configure”
- Build the DCMTK library with VS10
- Double click at the solution file: …/Projects/dcmtk/DCMTK.sln
- Choose build type “Release” and build the library.
- Double click at the solution file: …/Projects/dcmtk/DCMTK.sln
Build libVolRen
- Configure libVolRen with the CMake GUI
- Source: …/Projects/vvv
- Build: …/Projects/vvv
- The libMini and DCMTK dependencies are automatically detected, if they have been built in the ./mini/ resp. ../dcmtk/ directory.
- Build the libVolRen library with VS10
- Double click at the solution file: …/Projects/vvv/viewer.sln
- Build the solution
- Double click at the solution file: …/Projects/vvv/viewer.sln
Build QTV3
- Configure QTV3 with the CMake GUI
- Source: …/Projects/vvv/qtv3
- Build: …/Projects/vvv/qtv3
- The libVolRen dependency is automatically detected, if it has been built in the .. directory.
- Build the QTV3 with VS10
- Double click at the solution file: …/Projects/vvv/qtv3/QTV3VolumeRenderer.sln
- Build the solution
- Double click at the solution file: …/Projects/vvv/qtv3/QTV3VolumeRenderer.sln
Start And Debug QTV3
In VS10 right-click at the “qtv3” entry in list view on the left. Select “Set as StartUp Project” from the context menu. Then start the “qtv3” program via “Debug→Start Debugging”. To debug it, set a break point in the respective source file and start the program.
Test QTV3
- Please install the latest NVIDIA or ATI graphics drivers, because the volume renderer requires non-standard graphics extensions for best performance.
- Double click at …/Projects/vvv/qtv3/RelWithDebInfo/qtv3.exe
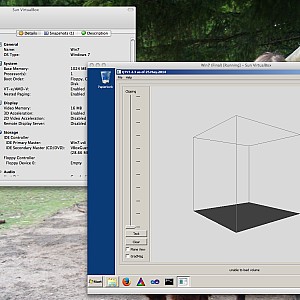
Here is a screenshot how it looks like in a virtual machine running Windows 7. The volume renderer does not show a volume yet:
To show a volume, just drag and drop a volume (.pvm .rek) into the window. For example the Bucky.pvm volume. A series of DICOM images (.dcm .ima) is also supported. Just drag and drop a series of DICOM images into the window.
Package QTV3
Using the instructions above, the QTV3 volume renderer is built against static libraries, meaning that it can be run as stand-alone executable.
Here is the latest stand-alone qtv3.exe.
The executable only depends on Windows core DLLs, that is msvcp100.dll and msvcr100.dll. On Windows 7 those are available by default. For other versions of Windows, we package the volume renderer together with the dependent DLLs and the default volume “Drop.pvm”, which is loaded upon program start. Thus, we need the following files to be contained in the package:
- qtv3.exe
- MSVCP100.DLL
- MSVCR100.DLL
- Drop.pvm
You can get the latest WIN32 package in the download section.
