Video Broadcasting HowTo
Motivation
Due to the Corona virus outbreak in March 2020 we all need to stay at home and the lessons and exercises at high school need to be broadcast online. This page logs my experience with building and using such a broadcasting studio. Let’s play!
Getting the Hardware
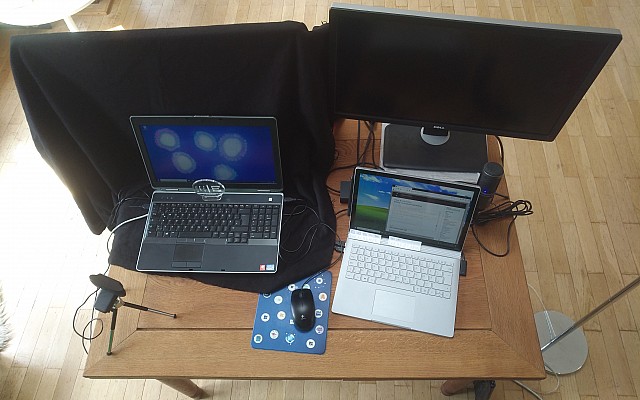
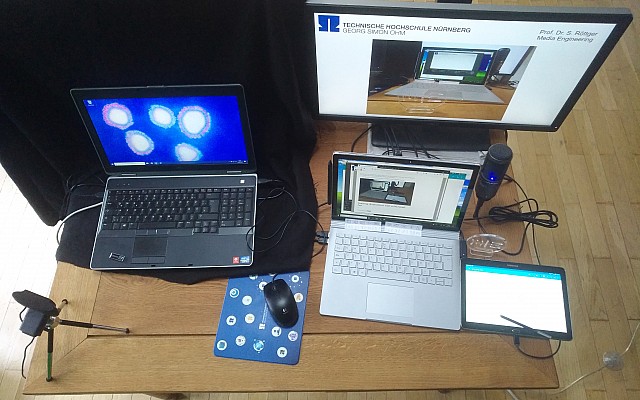
My computer hardware setup is the following:
- Computers:
- Microsoft Surface Book 2
- with Windows 10
- Dell laptop (Intel core i7)
- dual-boot with Ubuntu 18.04.3 LTS
- with Nvidia graphics
- with USB mouse and mouse pad
- Samsung Galaxy Note 10.1 tablet
- with S-Pen
- Microsoft Surface Book 2
- 2 Dell 24” monitors
- Audio Technica AT2020USB+ condensor mic with cardioid characteristics
- Webcams:
- Logitech 9000 Pro
- Logitech C922 Pro
- Sony alpha with Elgato Cam Link 4K
- Microsoft Surface Book 2 built-in camera
- Headphones
- Gigabit ethernet switch
- Fritzbox 4040 router
- USB hub
- An Android mobile with separate phone number for business
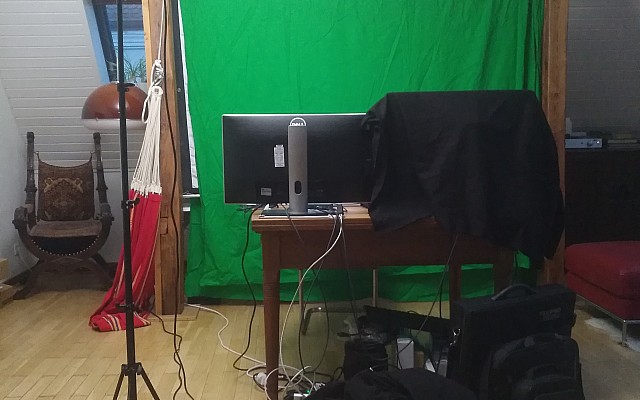
My studio setup is the following:
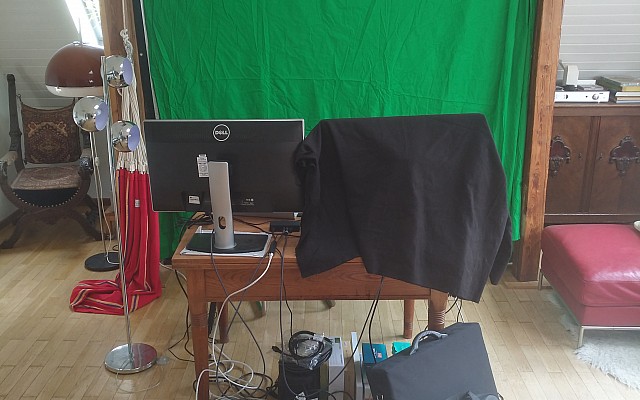
- 3 meter diagonal projection screen
- green-screen 3×2.6m fabric hanging over the projection screen from the ceiling down to the floor
- A table with my computer equipment in front of the screen
- Two dimmable lights for indirect lighting (Neewer bi-color 480 LED)
- Molton fabric to block light from disadvantageous directions
Camera assessment
Having tried out several cameras, the quality assessment is as follows:
- Logitech 9000 Pro: unusable
- Logitech C922 Pro: good quality, but automatic mode shows low detail under less than optimal lighting conditions
- Microsoft Surface Book 2 built-in camera has best quality except for the Sony alpha which plays in its own league
So the Microsoft Surface Book 2 is going to be the main hub for broadcasting with the built-in camera when sitting in front of the screen. One needs to have a marker to look at for natural poses. The Logitech C922 is hooked up as an external USB camera for capturing all other scenes. Audio recording is done solely via the Audio Technica 2020USB+. It needs to be placed in a silent room far away from any cooling fan that might start producing background noise. The Dell laptop serves as an additional work horse for doing demos, browsing the internet etc. Demoing needs to be practiced at least a single time beforehand to create a fluent video stream. If you are not rested and prepared well, do not try to produce a video!
OBS Studio Installation:
We download OBS Studio from https://obsproject.com and run the automatic configuration with the following settings:
- Choose to optimize for recording, not streaming
- Choose FHD 1920×1080 30 fps
Linux installation instructions:
- sudo add-apt-repository ppa:obsproject/obs-studio
- sudo apt-get update
- sudo apt-get install obs-studio
Windows settings:
- Disable system sounds and power saving
- Also disable all sounds of all other devices that are lying around
- Increase the display timeout to 2 hours or so
- Also disable the annoying windows notification assistant, so that it won’t pop up during recording
- Make sure that the screen saver is not activated before 2 hours
- Check that audio output is set to the internal speakers
- The Microsoft Surface Book 2 has two graphics cards: the integrated Intel 620 graphics and an NVidia GTX 1050
- To make sure that OBS is using the right one
- Goto the graphics settings and
- Set the Classic Apps settings for OBS to “Power Saving” for the integrated graphics . OBS will still be able to utilize the NVidia graphics card for video compression.
- Goto the graphics settings and
Next steps for configuring the main video camera source:
- Add source for internal video camera to actual scene (showing Me)
- Right-click on camera device source and add full-screen projector to show on external monitor connected to the HDMI output (not the display ports of the dock, this would slow things down, it is essential not to use the dock)
- In Settings → General enable “Save Projectors on Exit”
- Position LED light panels to the left and right pointing halfway to the ceiling, so that you look decent in the camera from left and right
Add chroma key filter for background:
- Right-click on the camera device and add “Chroma Key” video filter according to the particular greenish background color
- Add another “Color Correction” filter to reduce the saturation of reddish skin
OBS Studio Setup for Recording
Check recording settings:
- In Preferences → Output, switch to “Advanced output options”
- In “Recording” tab:
- NVENC
- CBR Quality high
- 1920×1080 @ 1000 kbps
- VBR Quality high
- 1920×1080 @ 1000–3000 kbps
- CBR Quality high
- no rescale
- 128 kbits for audio
- NVENC
OBS Studio Scene Setup
Add other sources to scene:
- Audio input source (Audio Technica 2020USB+ over USB hub with +9db)
- Screen (showing entire desktop screen, for VNC see below)
- Window (showing Powerpoint or Libre Office window for example)
- Tablet Window (for drawing illustrations, see scrcpy below)
- Chat Screen (showing Discord for example)
- Cam (showing external USB cam)
Duplicate and modify scenes to show:
- Window
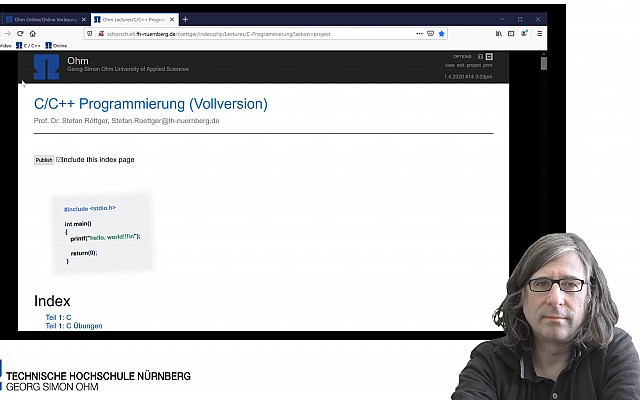
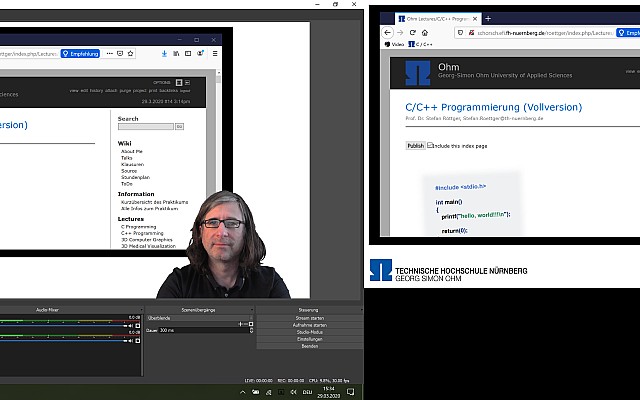
- Window + Me in the lower right corner
- Me + Window in the background
- Me
- Screen
- Cam
- Tablet + Me in the lower right corner
- Tablet
- Chat
- Chat + ME in the lower right corner
- Pause (with still studio image and without audio)
Ctrl-F maximizes a source.
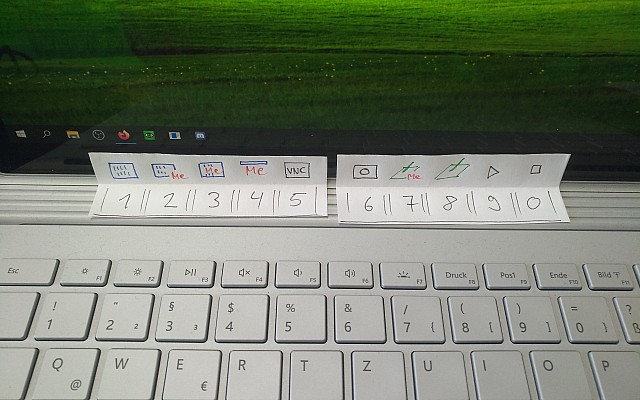
Define hot keys for the above scenes:
- Goto File →Settings → Hotkeys
- Enter Ctrl-1, Ctrl-2, … for each scene
- Alt-9 to start recording
- Alt-0 to stop recording
- Alt-a to pause recording
- Alt-s to resume recording
- Alt-p for pause scene
Add overlay for Me scene:
- Add color source as white background
- Add image and text source showing a logo and corresponding caption
Create lecture look-alike for Content + Me scenes:
- Add color source as white background
- Add color source as black board in the top left area
- Shrink main content source to be contained within the black board area
- Add logo below
Showing slides with Libre Office:
- Capture Libre Office window with OBS
- Run Libre Office presentation in window mode
- Maximize Libre Office window
- Add crop filter for the OBS window source
Recording a Discord Session
- Capture entire screen with OBS
- Connect a headphone as audio output
- Setup up discord so that the audio input is the studio microphone and audio output is the headphone
- In OBS add an audio input recorder for the studio microphone and an audio output recorder for the headphones
- Maximize Discord and other windows to be screen captured
Test recording:
- Right-click on the main window and select Full-screen Pre-view Projector to be visible on the external monitor
- Mirror the screen to the second external monitor
- Minimize OBS so that only the pre-view is visible on the external monitor
- Hit Alt-9 to start recording
- Hit scene hot keys to switch between scenes
- Hit Alt-a (anhalten) and Alt-s (starten) to pause and resume recording
- Hit Alt-0 to stop recording
- Back in OBS hit Alt-F Alt-R to show recording directory
Broadcasting the current OBS recording with Discord:
- Add a OBS preview screen on a separate monitor
- Stream that monitor with Discord
OBS Studio Setup for Streaming
- In Preferences→General, check “Record stream automatically”, so that the record button is pressed automatically, when you press the “Start streaming” button.
- In Preferences → Output, switch to “Advanced output options”. Then goto the “Streaming” tab and check “Rescale output” and lower the streaming resolution to 1280×720. Set the streaming bitrate to 500 kbps as a start. Increase later when testing.
Streaming from the Linux to the Windows laptop using VNC
The Linux work horse will do the majority of demoing. So the screen of the Linux box must be captured and transferred to the Windows 10 video recording computer.
For that purpose we connect the two computers via a Gigabit Ethernet switch and enable Internet Sharing on Windows 10:
- Press Windows key + X for the power user menu
- Select Network Connections from the menu
- Select Change Network Adaptor Options
- Right click on the network adaptor with an internet connection and select Properties
- Goto the Sharing tab
- Click on Allow Sharing
- Select the ethernet port through which the internet connection will be shared
- You will have to disable and enable sharing again after a reboot
A better option than internet sharing would be to hook up a router to connect to wireless and then connect the router to the switch via ethernet. This is way more efficient regarding VNC performance and achievable frame rate. This has been tested with a FritzBox 4040 router which connects to a FritzBox repeater, which in turn connects to the primary WiFi DSL router and DHCP server.
Now we install the Dell laptop as dual-boot with Windows 10 and Linux, so that we can stream demos from both operating systems via VNC. Use the second external monitor to mirror the screen.
VNC Server on Windows:
- We download and install UltraVNC 1.2.4.0 64-bit server and client on the server side (Dell laptop).
- Check “Install VNC as service”
- Launch UltraVNC Settings
- Set a password
- Enable loopback mode
- Reboot!
- Note IP address of the server:
- Press Windows key + R to run a command.
- Run ipconfig
- In this example the IP server address is:
- 192.168.137.251
- Run the VNC client in loopback mode as a first test:
- Connect to the server on “localhost”
VNC Client on Windows:
- We also download and install UltraVNC 1.2.4.0 64-bit client on the client side (Surface Book 2).
- Run the VNC client:
- Connect to the server at its current IP address
- For best performance over a gigabit switch, select hextile encoding in the options dialog and save this setting as the default!
VNC Server on Linux / Ubuntu 18.04 LTS:
- Installieren:
- sudo apt-get install x11vnc net-tools
- sudo x11vnc -storepasswd “PASSWORD” /etc/x11vnc.pass
- sudo chmod a+r /etc/x11vnc.pass
- Starten:
- x11vnc
- Der Server gibt das Display aus, das gestreamt wird, also z.B. :0
- Stoppen:
- vncserver -kill :0
- Endlos starten mit Authentifikation:
- x11vnc -forever -repeat -wait 5 -defer 0 -xd_area 0 -nowf -nonap -nowait_bog -allinput -rfbauth /etc/x11vnc.pass
VNC Autostart for Linux Server:
- add to ~/.profile
x11vnc -forever -repeat -wait 5 -defer 0 -xd_area 0 -nowf -nonap -nowait_bog -allinput -rfbauth /etc/x11vnc.pass -o ~/.x11vnc.log >&/dev/null &
- Um bei Xinerama nur den ersten Monitor von Display :0 zu streamen, fügt man die Optionen “-display :0 -clip xinerama0” hinzu (der zweite nicht zu streamende Monitor muss unterhalb des ersten Monitors platziert sein):
x11vnc -display :0 -clip xinerama0 -forever -repeat -wait 5 -defer 0 -xd_area 0 -nowf -nonap -nowait_bog -allinput -rfbauth /etc/x11vnc.pass >&/dev/null &
Now we can run a VNC client and capture its window with OBS (e.g. as a replacement for the previously used Screen scene).
Drawing illustrations with a Samsung S-Pen
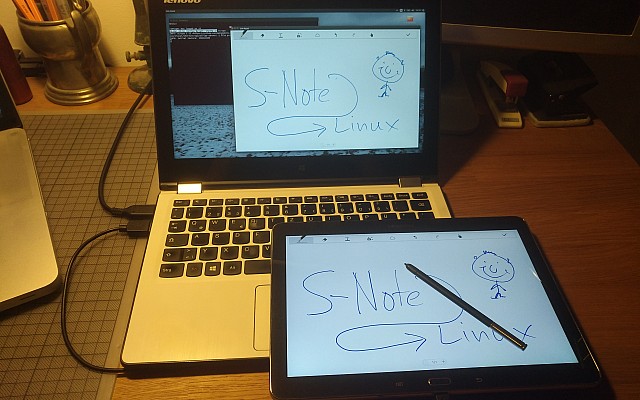
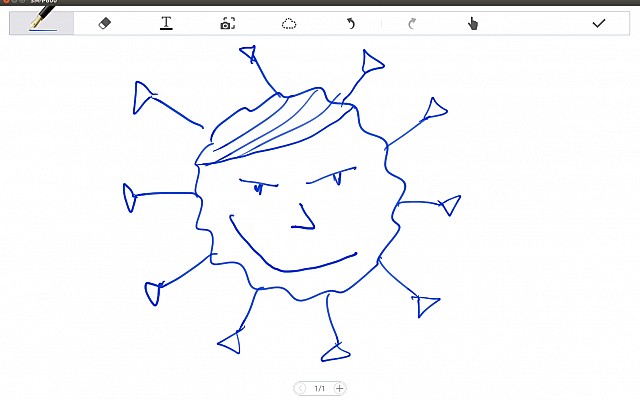
To draw illustrations, I am using a Samsung Note 10.1 table with digitizer pen, the S-Pen. Drawing by hand is very easy with the Samsung S Note app.
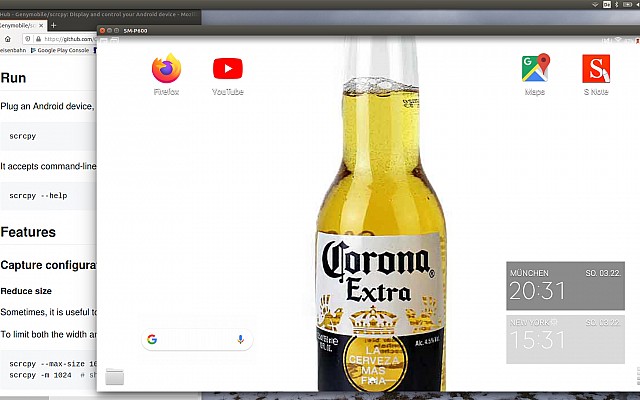
The main part is to get the tablet screen streamed to the broadcasting computer. I am using the open source tool scrcpy for that. Here is the setup in detail:
On the Android phone:
- Tap 7x on the build number in the system information to enable the developer options menu
- Enable USB debugging in the developer options menu
- Plug the tablet into the computer via USB cable
- Tap on the USB connection information in the status bar
- Change USB connection mode to MTP data transfer
- Allow USB connection from the connected PC
On the Linux side (Ubuntu 16.04 LTS):
- Install scrcpy
snap install scrcpy
- Run scrcpy from the cmd line:
- scrcpy
Linux Trouble shooting:
- Samsung driver support is a mess:
- To see if your PC recognizes the tablet try:
- adb devices
- lsusb
- If you do not see the device listed, try to use a USB2 port instead of a USB3 port.
- To see if your PC recognizes the tablet try:
On the Windows side:
- Download and unpack the scrcpy archive from scrcpy
- Run scrcpy.exe
Customizing and Using S-Note:
- By default the background shows text lines
- To replace that with a pure white background tap on the menu hardware button, select options from the home screen, and change the default template to empty.
An alternative to S-Note is Squid Notes. With it you can draw with the S-Pen, erase with a finger touch and instantly clear the board just by going to the next slide with >+ .
- In OBS add a window source and add a crop filter to mask the apps menu bar
- On the tablet disable the screen saver via Developer Option “Keep active”
Setup Completed
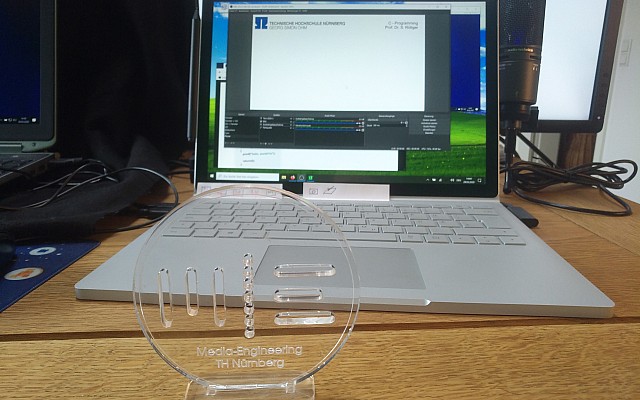
Having completed the setup in April 2020, the entire recording and broadcasting system looks like that:
Now that the setup is finished, we export the scene collection and the profile as a backup to get back to the last version, if we break something.
Additionally, we disable all software updates that might possibly break something in the future!
Addendum February 2021
It is 2021 and Corona is still not under control, so that we are starting into the third online semester. But one new feature of OBS has just arrived, which makes online meetings more fun.
The OBS team has been adding a virtual camera to its invaluable software. Besides recording and streaming scenes, there is now a third button to start broadcasting the setup scenes into the OBS virtual camera device. For online conferencing with zoom discord and the likes this opens up a whole new lot of possibilities, because one just selects the virtual camera device in the conferencing software. If the software lacks a feature like green-screening, one just supplies it via OBS and its virtual camera. Well done, OBS. Thanks a lot!
Addendum May 2023
Now is the first semester that all courses are taught in presence again. Can’t believe that it started already 3 years back.
Welcome in the After-Corona-Online-Era and
Happy Broadcasting!


