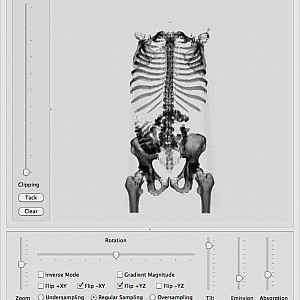
QTV3
QTV3 Usage
Drag and Drop:
- Drop pvm or raw volume files into the window
- Drop a selection of DICOM images into the window
Data repository:
http://schorsch.efi.fh-nuernberg.de/data/volume
Example data set:
http://schorsch.efi.fh-nuernberg.de/data/volume/CT-Abdomen.pvm
Navigation:
- Rotate
- Tilt
- Zoom
Windowing:
- Click at the render view to select a window of scalar values to be displayed
- Horizontal mouse cordinate defines the center of the scalar window to be displayed.
- Vertical mouse cordinate defines the width of the scalar window to be displayed.
- Keeping the button pressed displayes the histogram of the volume as overlay.
Common Windowing Use Cases:
- To eliminate noise (which has low scalar values) click at the right top edge of the render view.
- To mask bone of a CT Scan select a range of medium scalar values by clicking at the center of the render view.
- To explore the data set keep the mouse pressed and move it to adapt the scalar window until it fits.
Transparency:
- Modify the opacity of the volume by clicking at the “Opacity” button on the right (or the “Emission” and “Absorption” sliders in the lower interface section).
- Then dragging the mouse up and down modifies the brightness and translucency of the volume rendering.
Clipping:
- Define view-aligned front clipping plane with the “Clip” slider.
- The clip plane is parallel to the view plane, it does not stay fixed to the volume.
- To make the actual clip plane fixed to the volume click at the “Tack” Button.

